
Hammerhead Karoo (beta)
How to install on Hammerhead Karoo (beta)
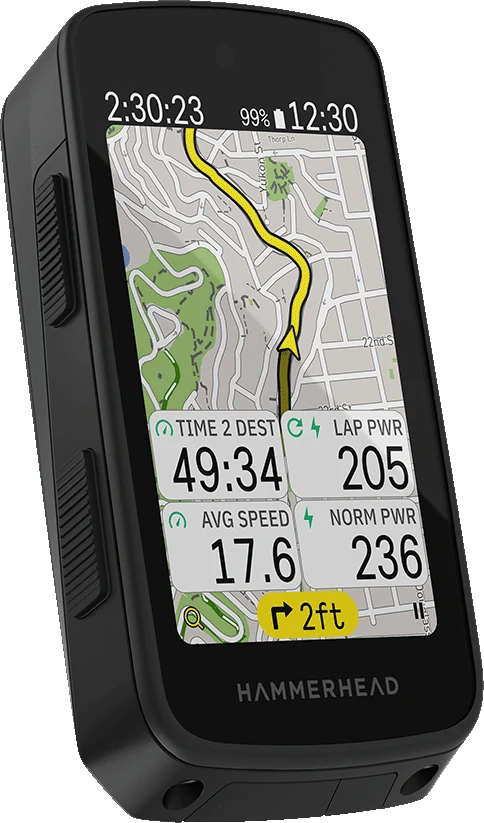
The Karoo runs Android apps, so BrakeAce installs from a single .apk file. On the current Karoo (Karoo 3) the easiest way is to send it from your phone with the Hammerhead Companion app. After that, this page shows how to open BrakeAce and use it on a ride.
Which method should I use?
- — Karoo (2024, aka Karoo 3): use the Hammerhead Companion app (Method A). No computer needed.
- — Karoo 2: use a computer and USB cable (Method B). Hammerhead's Companion app sideloading only works on the latest Karoo.
The BrakeAce Karoo app
The download isn't published here yet. Email support@brakeace.com and we'll send you the latest build.
Method A — Hammerhead Companion app (Karoo 3)
Before you start: update your Karoo's software (version 1.538.2049 or newer per Hammerhead), connect the Karoo to Wi-Fi, and install the Hammerhead Companion app on your phone (Android 1.36.0+ or iPhone 1.12.0+), paired with your Karoo.
- 1Turn on your Karoo and make sure it's on Wi-Fi.
- 2On your phone, open this page in your web browser.
- 3Long-press the "Download" button for the Karoo app below (don't just tap it).
- 4Choose Share, then pick Hammerhead Companion from the share menu.
- 5The Companion app shows a "Transferring" screen. An Install screen then appears on your Karoo.
- 6Tap Install on the Karoo. Done!
Already downloaded the .apk to your phone? Open it in your Files app, tap Share, and pick Hammerhead Companion — the rest is the same.
Hammerhead says it has only verified GitHub links for this. If sending the link fails, download the file first and share the file instead, or use Method B.
Method B — USB cable and computer (Karoo 2, or if Method A fails)
- 1On the Karoo, go to Settings → About and tap "Build number" about seven times until it says you're a developer.
- 2Go back, open Developer options, and turn on USB debugging.
- 3On your computer, install Android's free "platform-tools" (it includes the adb command). On Mac you can also run: brew install android-platform-tools
- 4Download the BrakeAce .apk from this page.
- 5Connect the Karoo to your computer with a USB-C data cable. If the Karoo asks to allow USB debugging, tap Allow.
- 6Open Terminal (Mac) or Command Prompt (Windows) in the folder with the file and run: adb install -r brakeace-karoo-<version>.apk
- 7When it says "Success", unplug the Karoo. BrakeAce is now in your apps.
1. Open BrakeAce
After install, the app is named BrakeAce Karoo. On current Karoo software, sideloaded apps are in the Extensions library.
- 1On the Karoo home screen, tap Apps.
- 2Open Extensions.
- 3Tap BrakeAce Karoo.
2. First launch, permissions, and sign-in
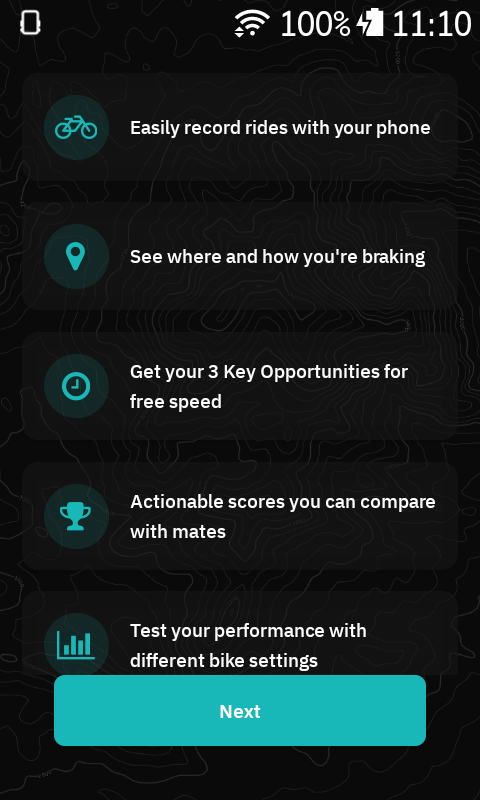
The first time you open the app, it shows a short intro, asks for permissions, then asks you to sign in.
- 1Tap Next through the intro.
- 2On Permissions Required, tap Continue on each item and accept the Android prompt. BrakeAce needs location and Bluetooth access.
- 3For background location, choose Allow all the time on the Android screen. The route is recorded only while a ride is recording.
- 4Sign in with your BrakeAce email and password, the same account you use in the phone app.
3. Connect front and rear sensors
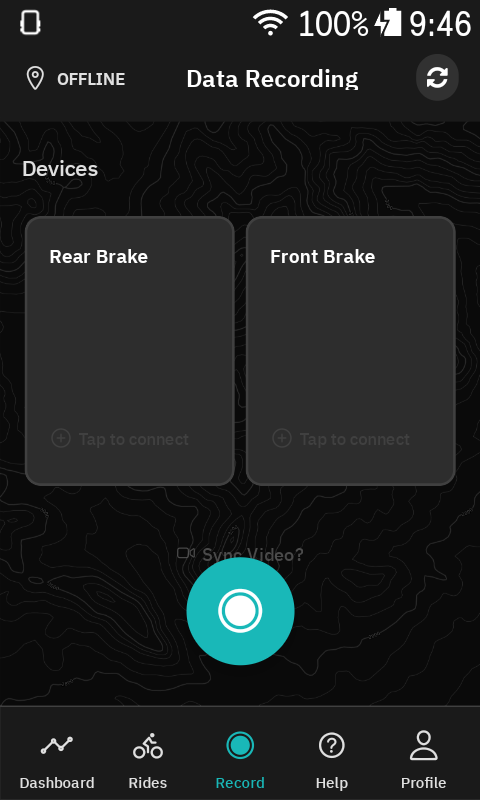
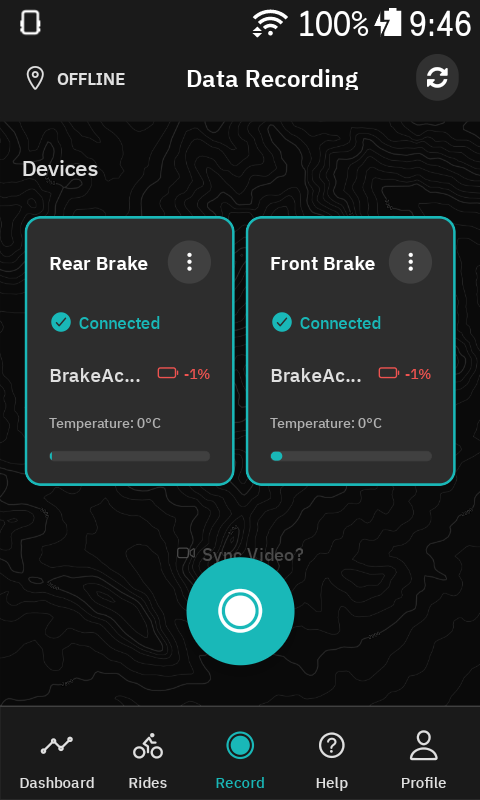
Everything on the bike starts on the Record tab, which has two slots: Rear Brake and Front Brake. Connect each sensor to the slot for its brake.
- 1Tap Record in the bottom bar.
- 2Each empty slot says Tap to connect. Tap Rear Brake or Front Brake.
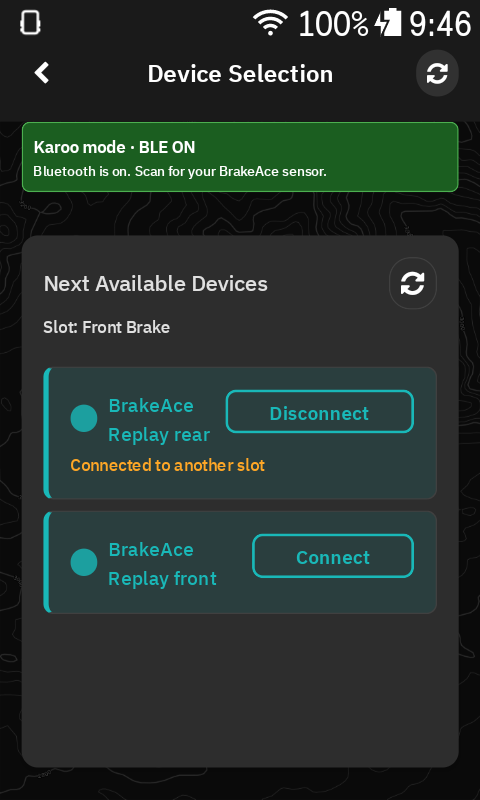
- 3Device Selection opens and scans for BrakeAce sensors. If it shows BLE OFF, tap Request Karoo Bluetooth.
- 4Under Next Available Devices, tap Connect next to your sensor.
- 5If the sensor is already on the other brake, it shows Connected to another slot. Disconnect it there first, then connect it here.
- 6Go back to the Record screen. The slot shows Connected, the sensor name, temperature, and a level bar.
To move a sensor to the other brake, open the ⋮ menu on its slot, choose Disconnect & Forget, then connect it to the other slot.
4. Record a ride
- 1On the Record screen, tap the round button at the bottom to start recording.
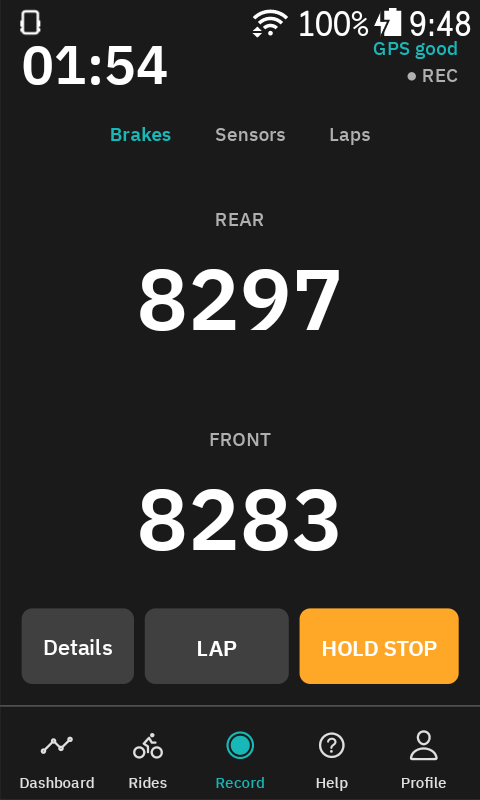
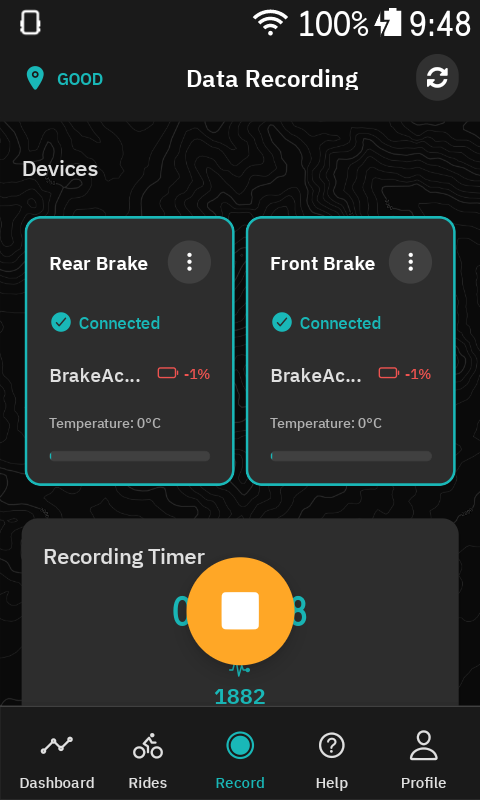
- 2While recording, a large-number view shows your brakes. Tap Brakes, Sensors, or Laps at the top to change page, and Details to return to the Record screen.
- 3Tap LAP to mark a lap.
- 4To stop, press and hold HOLD STOP, or tap the orange stop button on the Details screen.
- 5The ride is saved and appears under Rides once you are signed in.
Update to a new version
- 1Karoo 3: send the new .apk with the Companion app again (Method A) and tap Install. Your data stays.
- 2Karoo 2: run adb install -r with the new file (the -r keeps your data).
Remove the app
- 1On the Karoo, open Settings → Apps (or the Extensions library on newer software), choose BrakeAce, and uninstall.
- 2Over USB you can also run: adb uninstall followed by the app's package name (email us if you need it).